Fixing a Leaking or Stiff Vitamix/Kuchef/Omniblend/etc. Blender Blade Assembly
-
Mario Guggenberger
- March 11, 2015
Buying a cloned device for a small fraction of the original’s price is often not a good idea, unless you’re handy and like to tinker. One example are cheap Vitamix blender clones, made out of the cheapest parts the manufacturers can find. This guide shows you how to replace the ball bearings in a blade assembly of such a clone (probably works for a real Vitamix too), if your jar is leaking brown oil or the blades became stiff. This saves you from buying a complete blade assembly unit and upgrades the drive train to better durability and smoother operation.
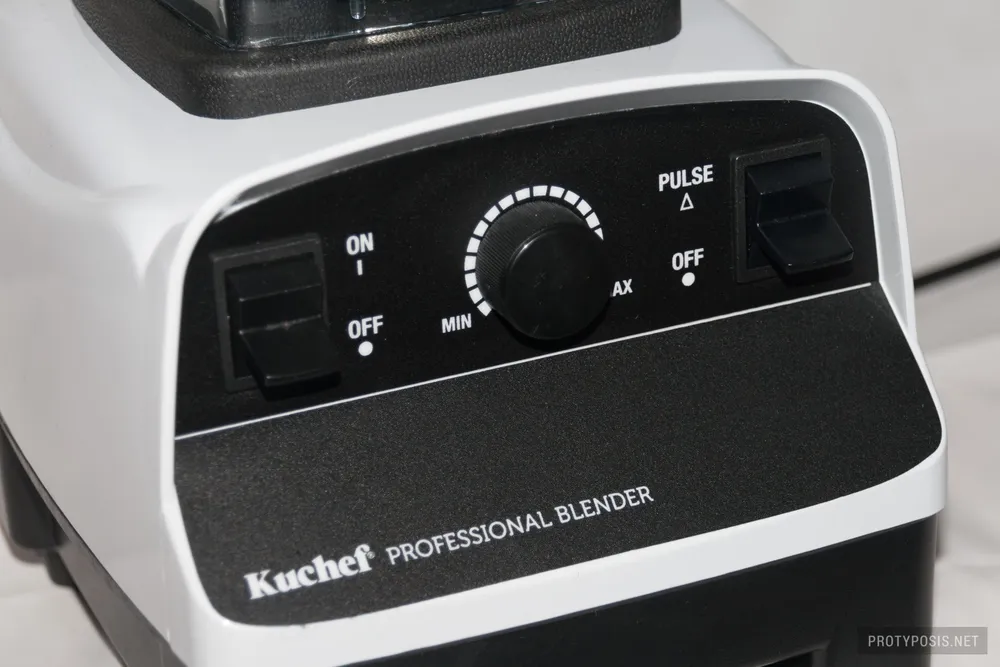
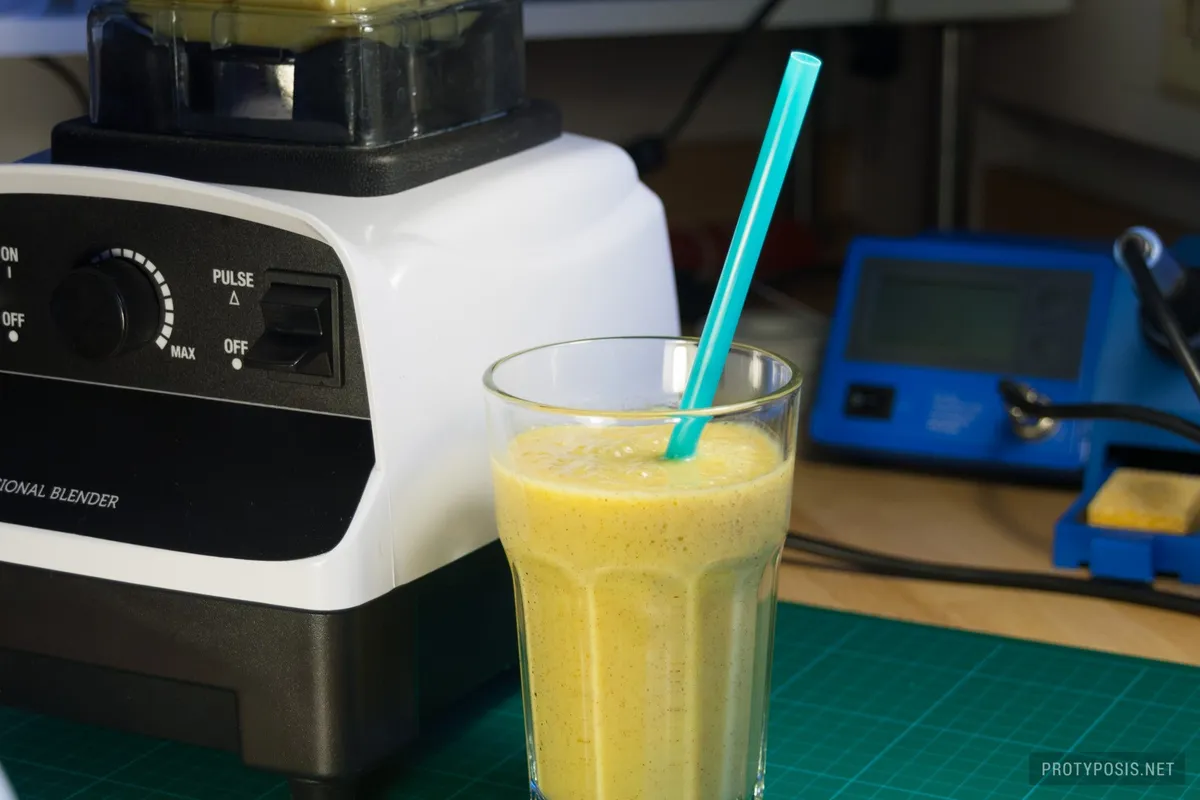
I’ve been wanting a decent blender for making smoothies for a long time, but spending 600€ for a BlendTec or Vitamix was just way too much. About three months ago on holidays in Australia, I found an offer I couldn’t refuse: Aldi had the Kuchef Professional Blender (CB1390) on sale for 69 AU$, which translates to just 50€. It’s a clone of the popular Vitamix 5200 machine which is specified at a similar wattage (1390W vs. 1380W), but slower RPM (25000 vs. 35000). Spare parts are pretty much compatible, the only difference to take care of is the different drive socket that connects the jar’s blade assembly to the motor base. Another difference that I’m not sure of is a security switch on the Kuchef blender, which prohibits switching on the motor without a jar on top. Clones are also sold by many other vendors, e.g. Omniblend, JTC and various Asian brands, and there’s an abundance of cheap spare parts available on the internet.
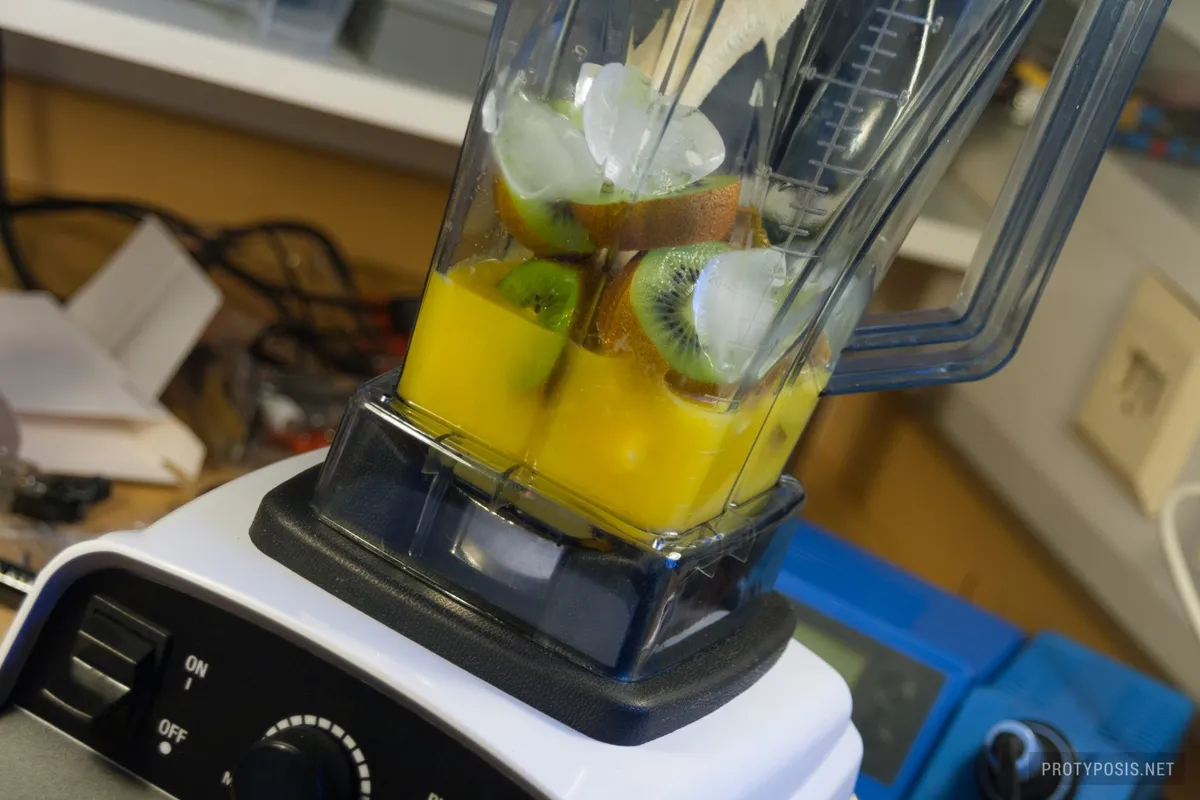
The blender works really great, even huge ice blocks are no obstacle, and it blends the small seeds of kiwi too. Compared to a Waring Pro blender, a common machine in the US which I was using for a few weeks, it is incredibly better. I’ve been using it daily since I got it, but after only two weeks it started leaking brownish/blackish oily stuff on the bottom of the blade assembly (luckily it didn’t leak into the jar). This wasn’t a problem until a few days ago, when the blades finally got stuck and stopped turning without applying lots of force. The ball bearings inside the blade assembly had lost too much lubricating oil and the increased friction and heat finished them off. This isn’t really a surprise; using the cheapest ball bearings ever on exactly the part that gets the most force applied is destined to fail sooner or later.
At this point, you have four options: (1) contacting the vendor for warranty (the Aldi blender has 5 years warranty, but Australian warranty doesn’t help me a lot in Europe), (2) buying a new blade assembly unit, (3) replacing the broken ball bearings, or (4) throwing that pile of junk to the trash and buying a “real” blender. A new Vitamix blade assembly unit is too expensive, a cloned one could break again soon. To keep it cheap and effective, I’m going to guide you through option number 3.
Disassembly
-
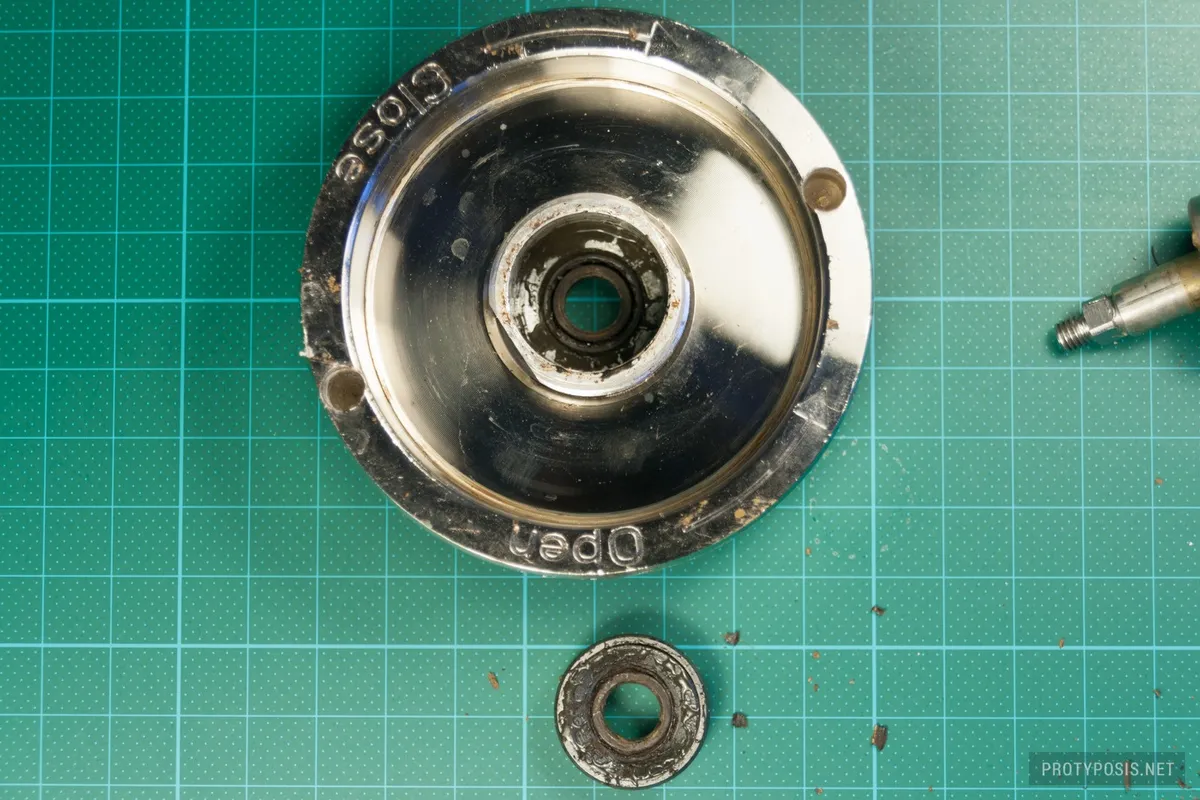
1a) Remove the retainer to get the blade assembly out of the jar -
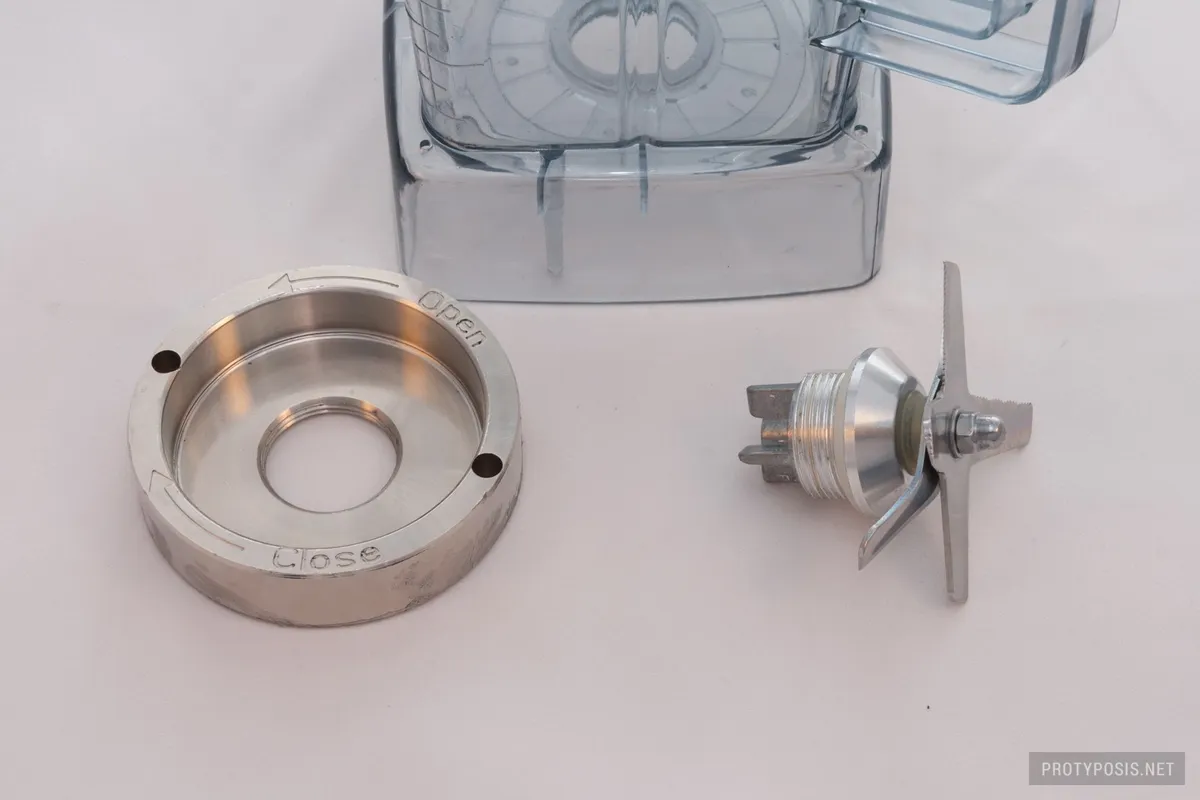
1b) Disassembled jar -
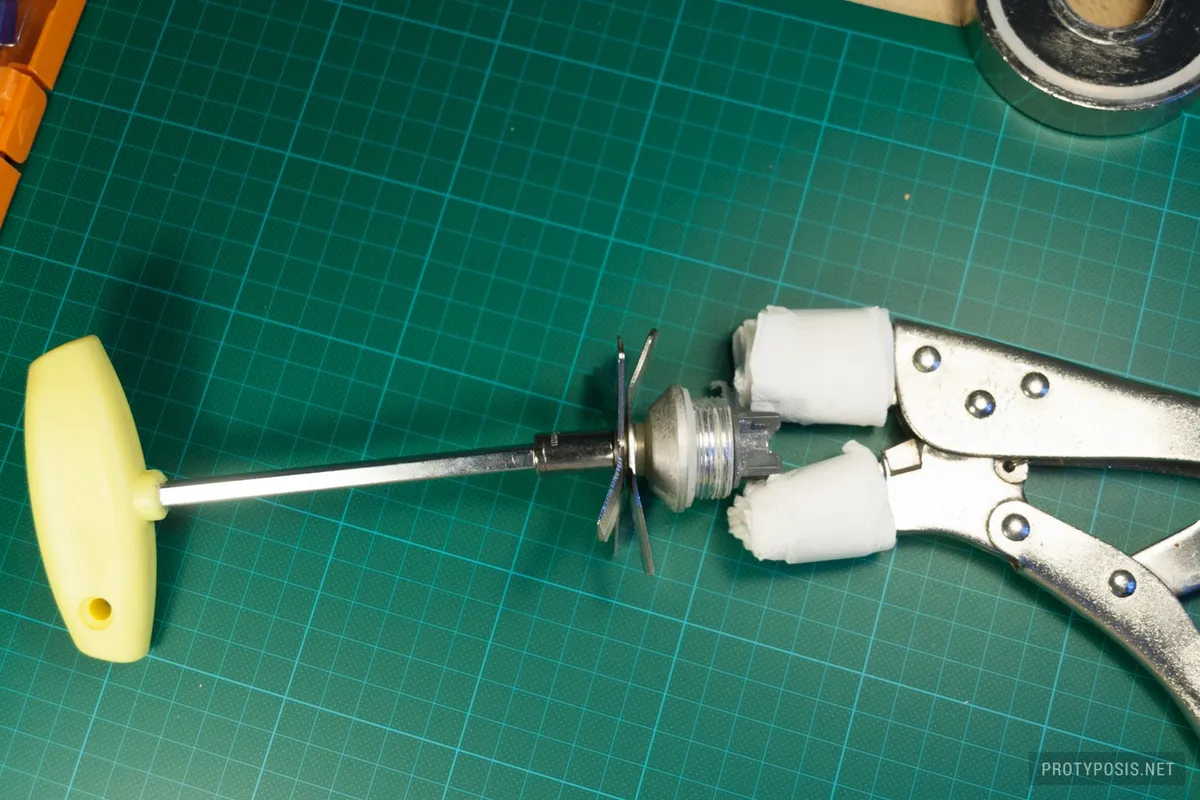
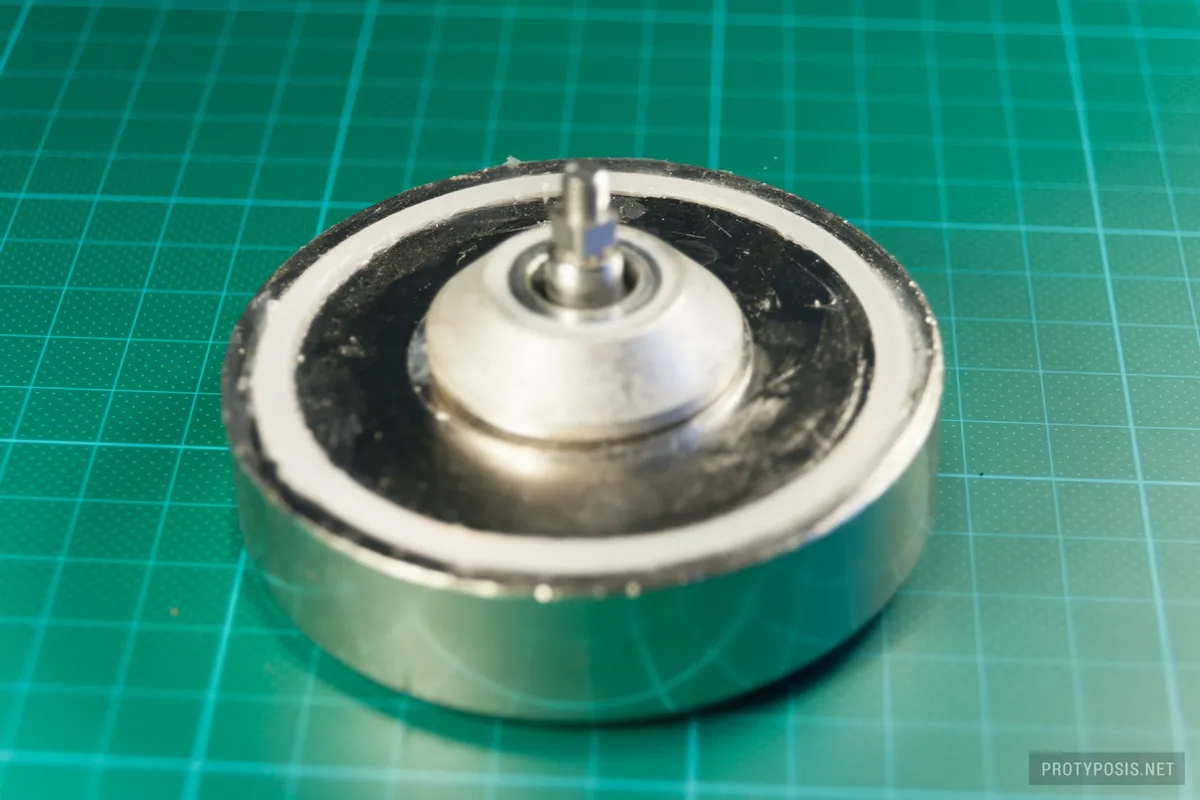
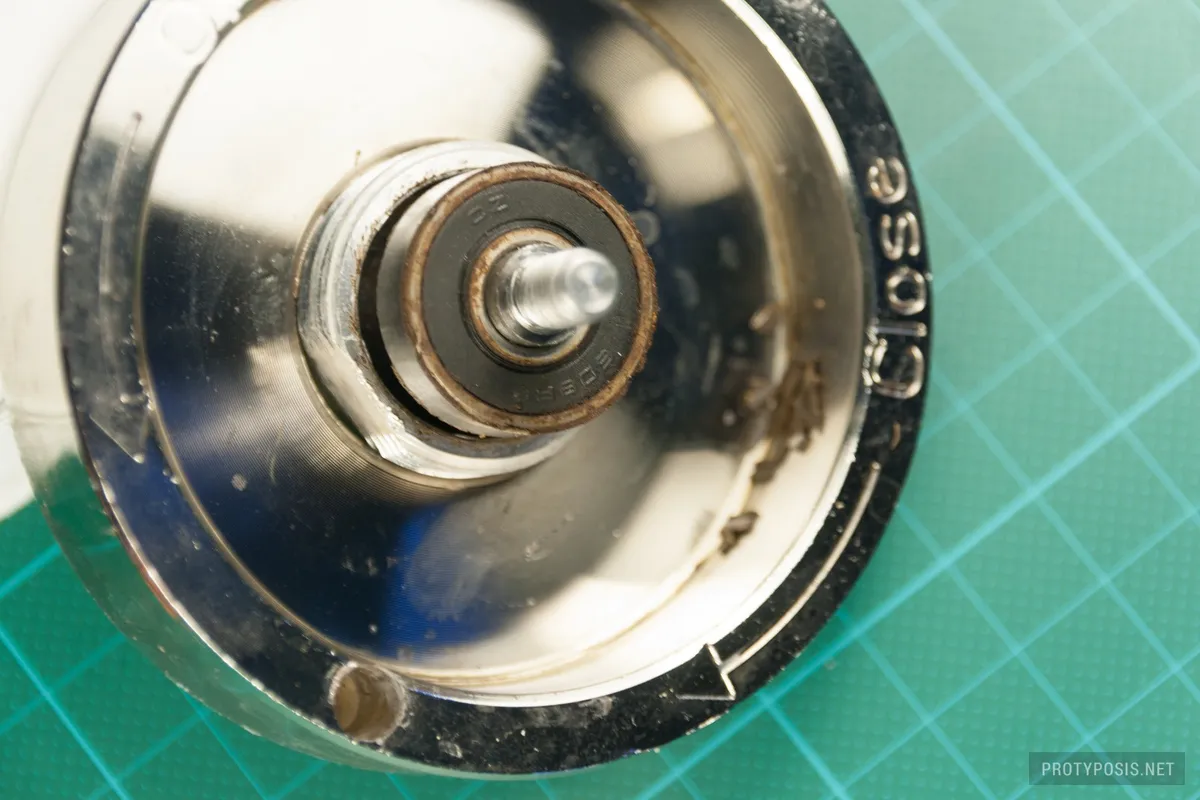
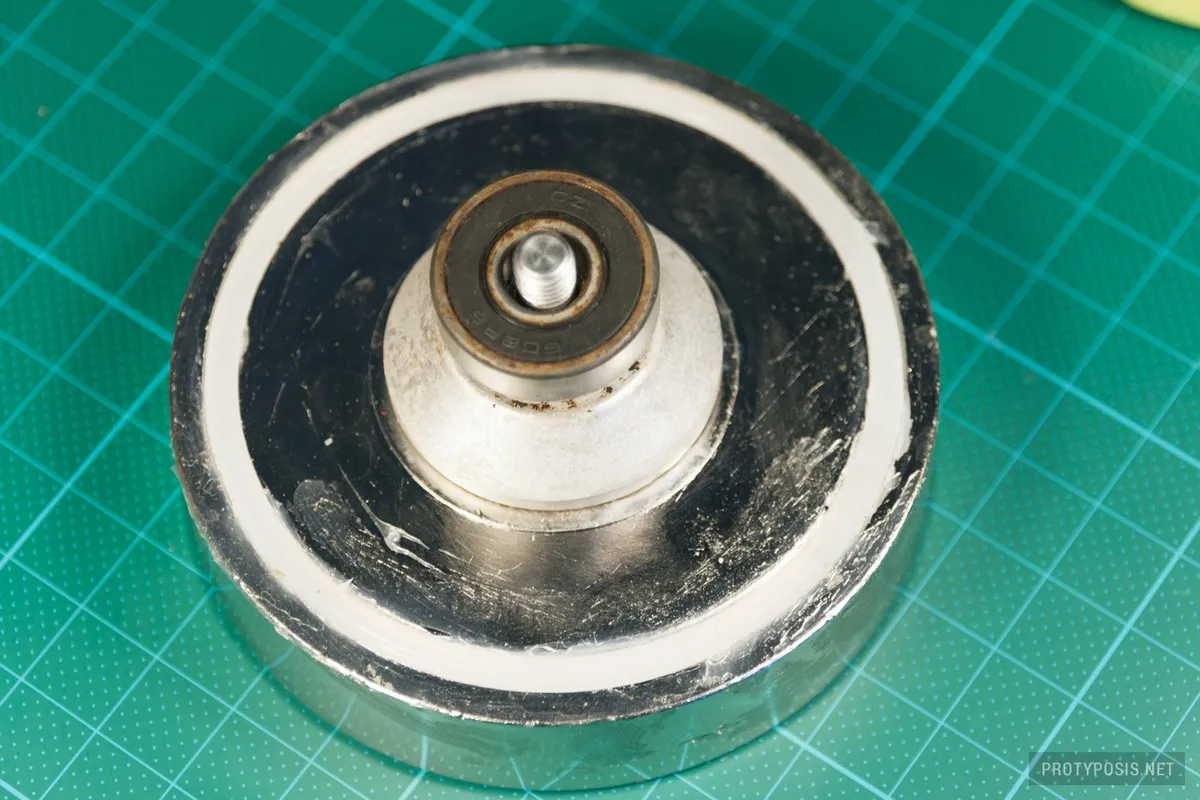
2a) Removing the blades and drive socket -
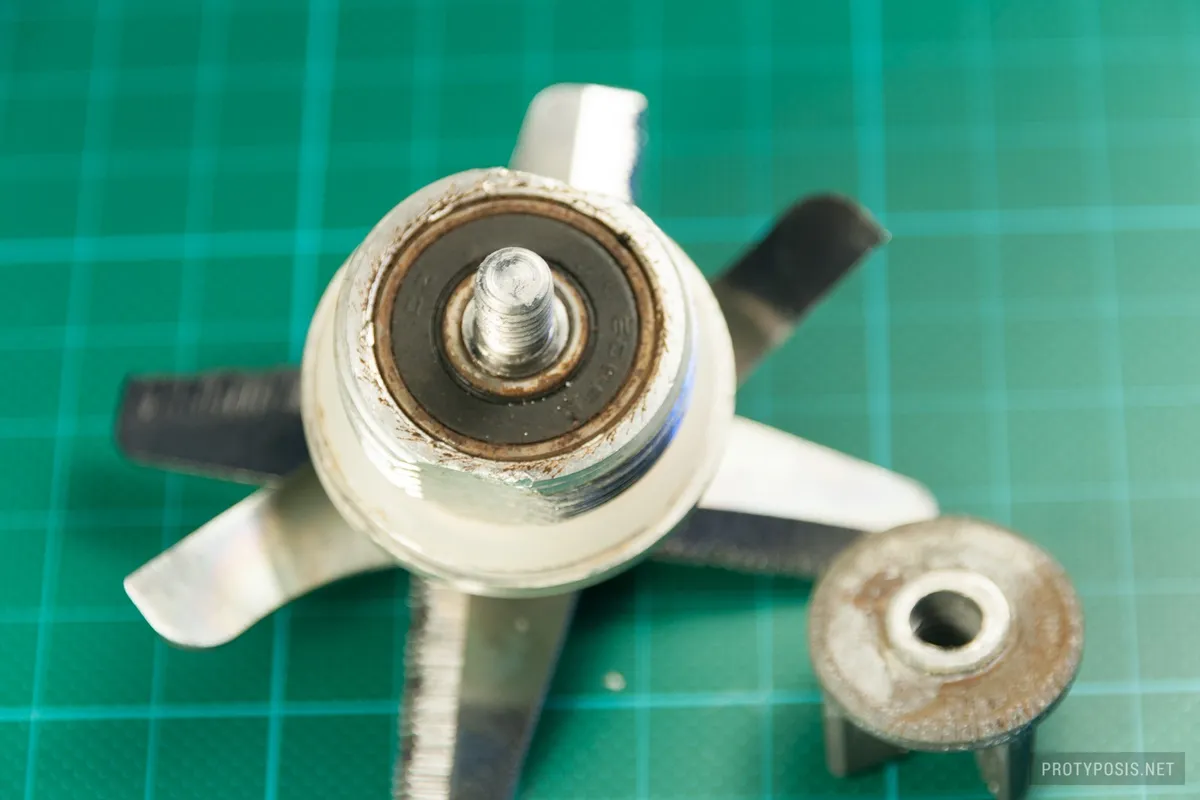
2b) Brown residue from the bearings -
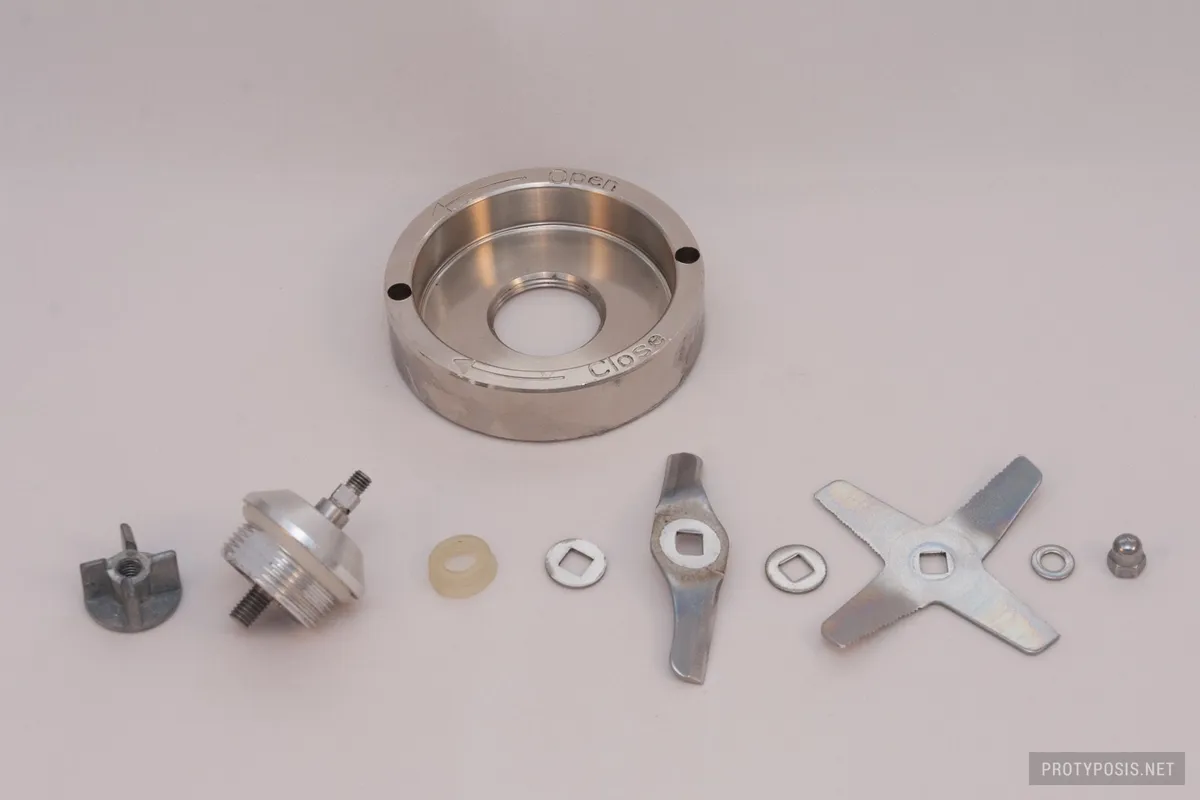
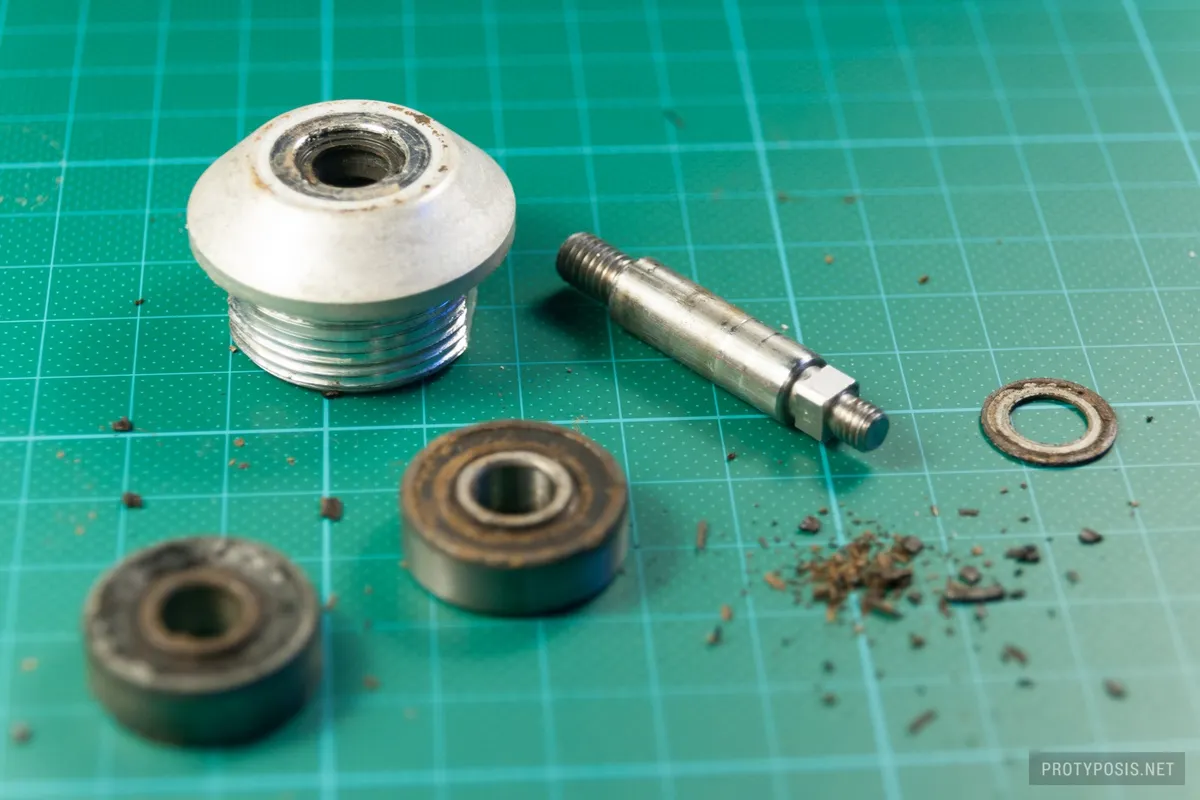
2c) Disassembled blade assembly -
3a) Removing the drive axle from the housing -
3b) Removed drive axle with first bearing -
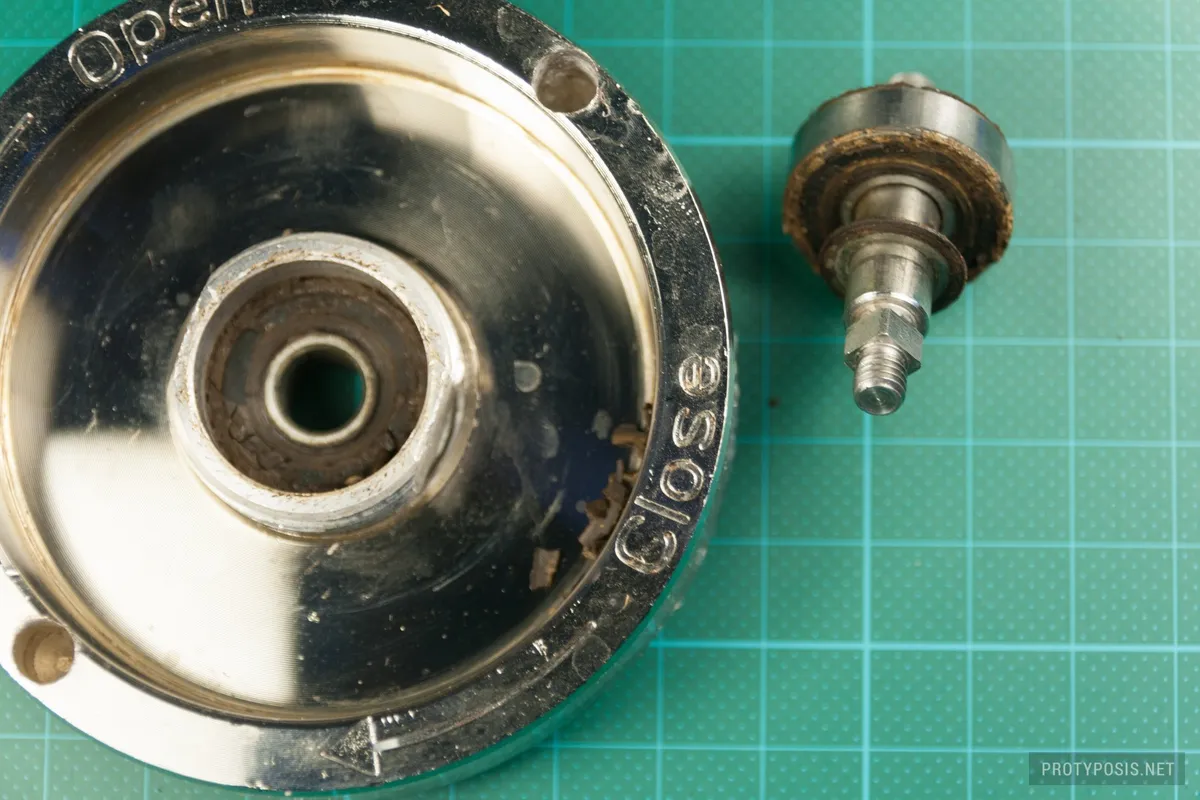
3c) Awful leaked stuff you don’t want to have in your smoothie -
4) Removing the bearing from the axle -
5a) Removing the second bearing from the housing -
5b) Disassembled bearing housing
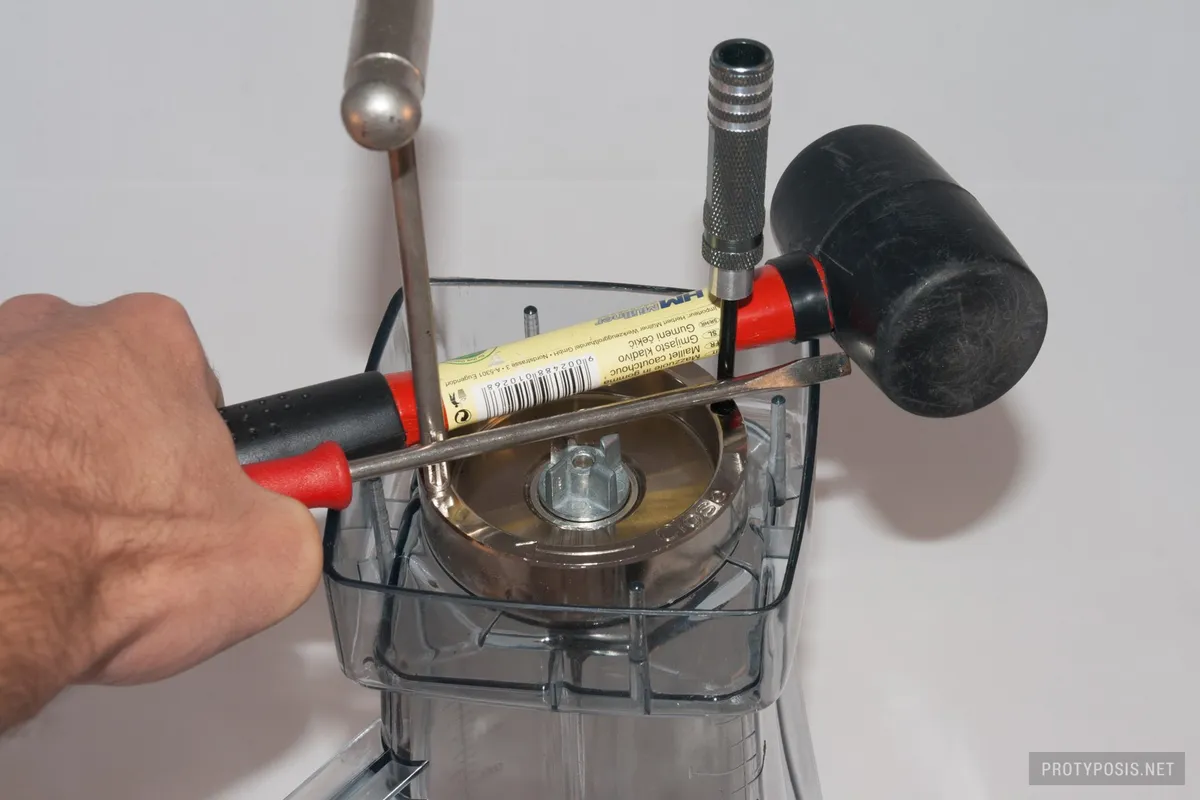
Step 1: Remove the blade assembly unit from the jar. There’s a special tool for that called retainer nut wrench, but you can improvise by putting two objects into the retainer holes with about the same diameter to serve as shafts, and them use two other long objects to serve as levers to loosen the retainer. In Picture 1a I’m using hammers and screwdrivers for the task. Once loosened, you can easily remove the retainer by hand, and the blade unit comes out almost on its own (Picture 1b).
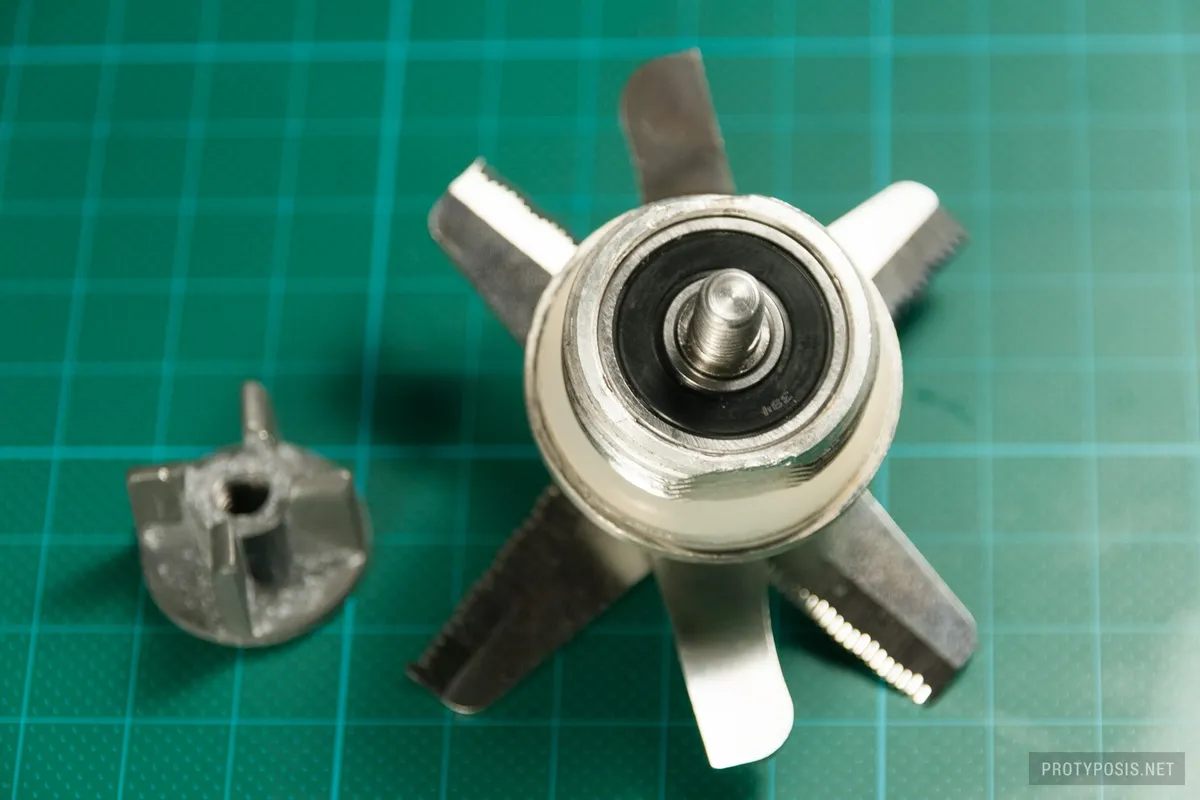
Step 2: Remove the blades and drive socket from the assembly unit by blocking the axle from turning and using an 8mm wrench (socket) to loosen the nut that holds the blades. I blocked the axle at the drive socket with pliers wrapped in a thick layer of kitchen paper to avoid damages on the socket (Picture 2a). For blenders with the Vitamix-type multi-tooth drive socket, it might be easier to block the blades. Once the drive socket is removed, you can already see the first ball bearing and some more of that nice brown stuff (Picture 2b). Make sure to remember exactly how much the axle sticks out from the bearing, you will need it for the reassembly. Once everything is taken apart, you end up in a similar state as in Picture 2c, and you should also remove the rubber seal around the head of the bearing housing.
Step 3: Now comes the hardest part, removing the axle from the bearing housing, where all components stick together very tightly. Put the housing into the retainer as in Picture 3a, then put two spacers under the retainer (not shown in the picture). The spacers can be anything stable that create additional room between the surface you’re working on and the retainer, like pieces of wood or books; they need to be a few centimeters high, so there’s enough space on the bottom for the axle to come out. Then take a hammer and beat the axle downwards out of the housing, until it comes loose (Picture 3b). Once removed, you can see even more of the awful brown stuff. If you are lucky, one bearing also came out of the housing, so take care of the shim between the two bearings.
Step 4: To remove the bearing(s) from the axle, put them on top of the housing and again hammer the axle down, out of the bearing as seen in Picture 4.
Step 5: The last step of disassembly is removing the second bearing from the housing if it is still stuck inside (Picture 5a). Put a stable screwdriver though the hole on the head of the housing to the inner ring of the bearing, just under the rubber seal inside the housing’s head, and again hammer it out. You don’t need to take care about damaging the bearing, it’s broken anyway. You end up with a completely disassembled hearing housing like in Picture 5b.
Reassembly
Step 6: Before reassembling, you need to get two new bearings. Fortunately a very common size is used, 608, the same as used in skateboard and roller skate wheels. I’ve seen a 16 pieces package for 10€ at a local sports retailer, but since they’re probably the same cheap stuff as the broken ones, I went for two SKF 608-2RSH bearings for about 20€ total (Picture 6). That’s pretty expensive for a 50€ blender, but it’s a high-end product that hopefully lasts longer. SKF claims that their bearings are the best on the market, but, which company wouldn’t claim that of their product. Just make sure that the ones you get are of the 2RS type, which means double-sided rubber seal. There’s also bearings with metal seal available (ZZ), which are not as tight as the rubber sealed types.
Note: An observant reader has pointed out that the bearings I suggest are specified for 22000 rpm max, which is too low for certain blenders. As of February 2016 (almost a year after this guide was published), these bearings are still doing great in my Kuchef blender rotating at 25000 rpm max (update December 2023: had to replace them once in the meantime). If your blender spins much faster, consider bearings with higher rated rpm like the SKF 608-Z or SKF 608-RSL (both with a limiting speed of 48000 rpm). In practice, though, blenders don’t reach their max rpm when loaded. With partly sealed bearings, make sure the seal points towards the jar.
-
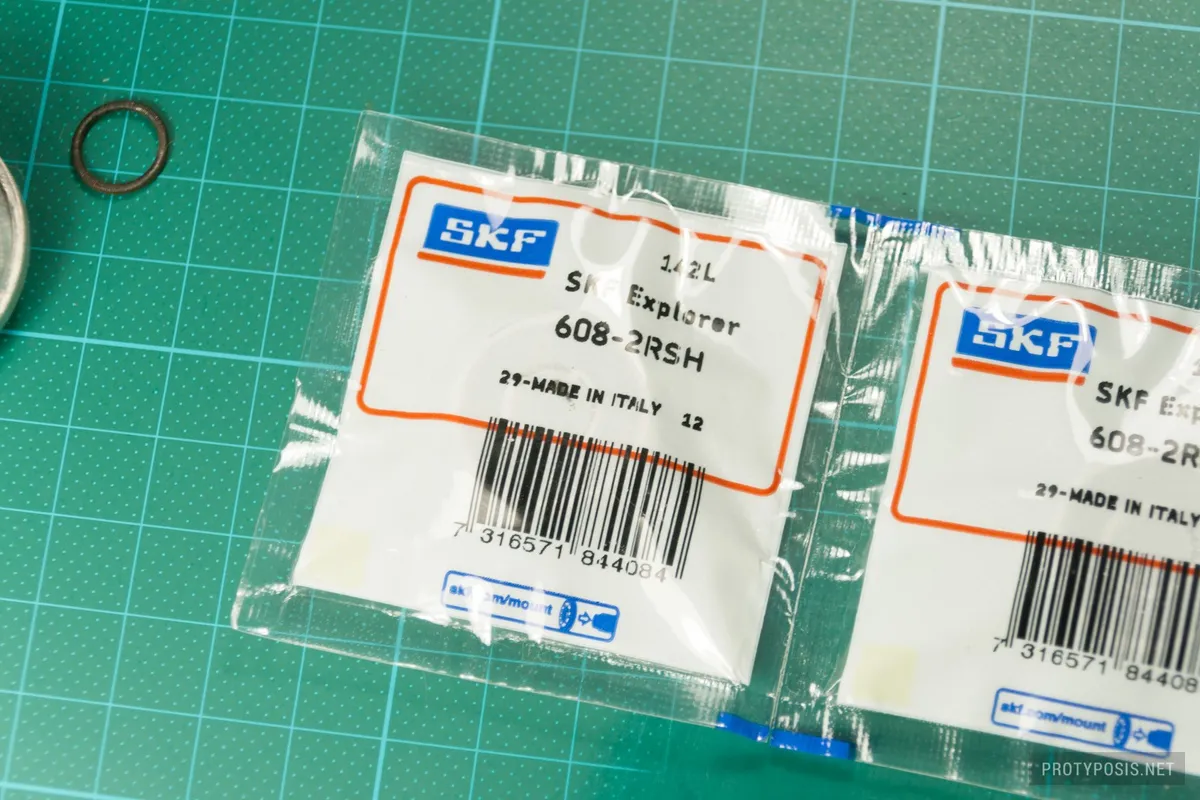
6) New bearings -
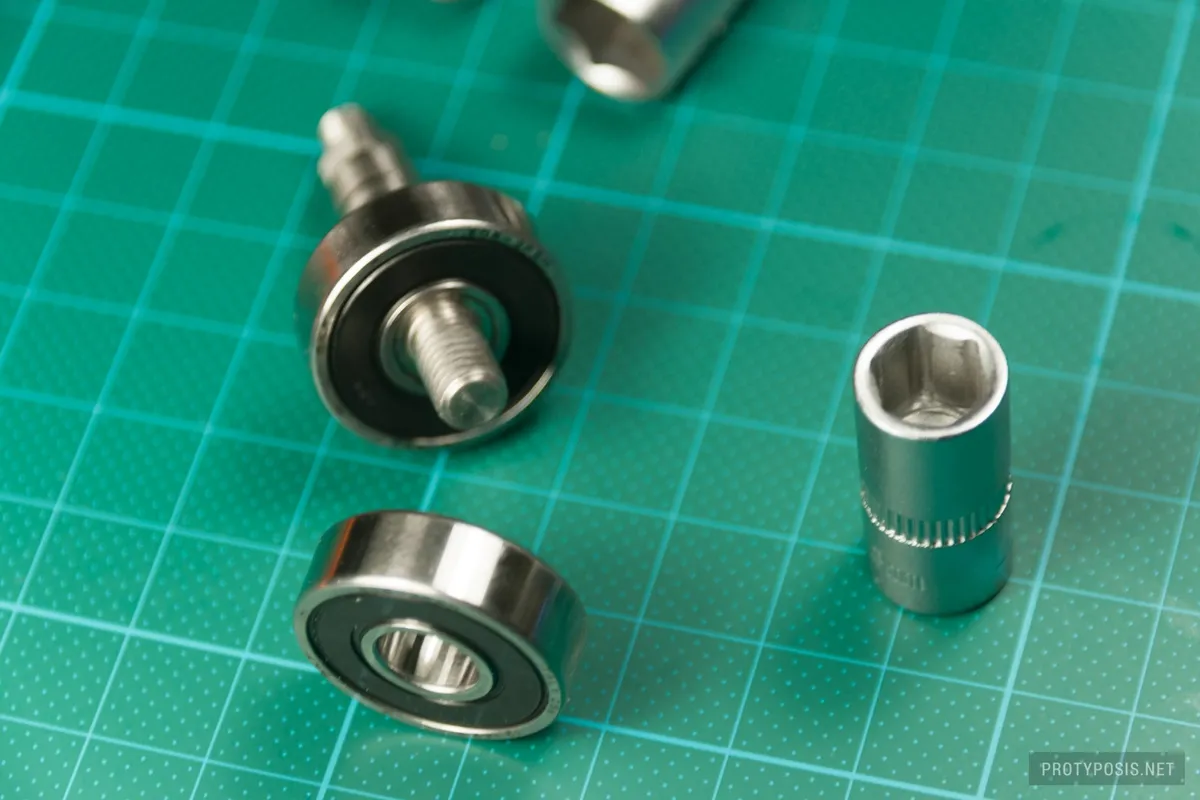
7a) Mounting the new bearings on the axle -
7b) Mounting the new bearings on the axle -
8) Putting the bearings and axle back into the housing -
9a) Reassembled blade assembly with new bearing -
9b) The moment of truth has finally come -
9c) Enjoy your working blender :)
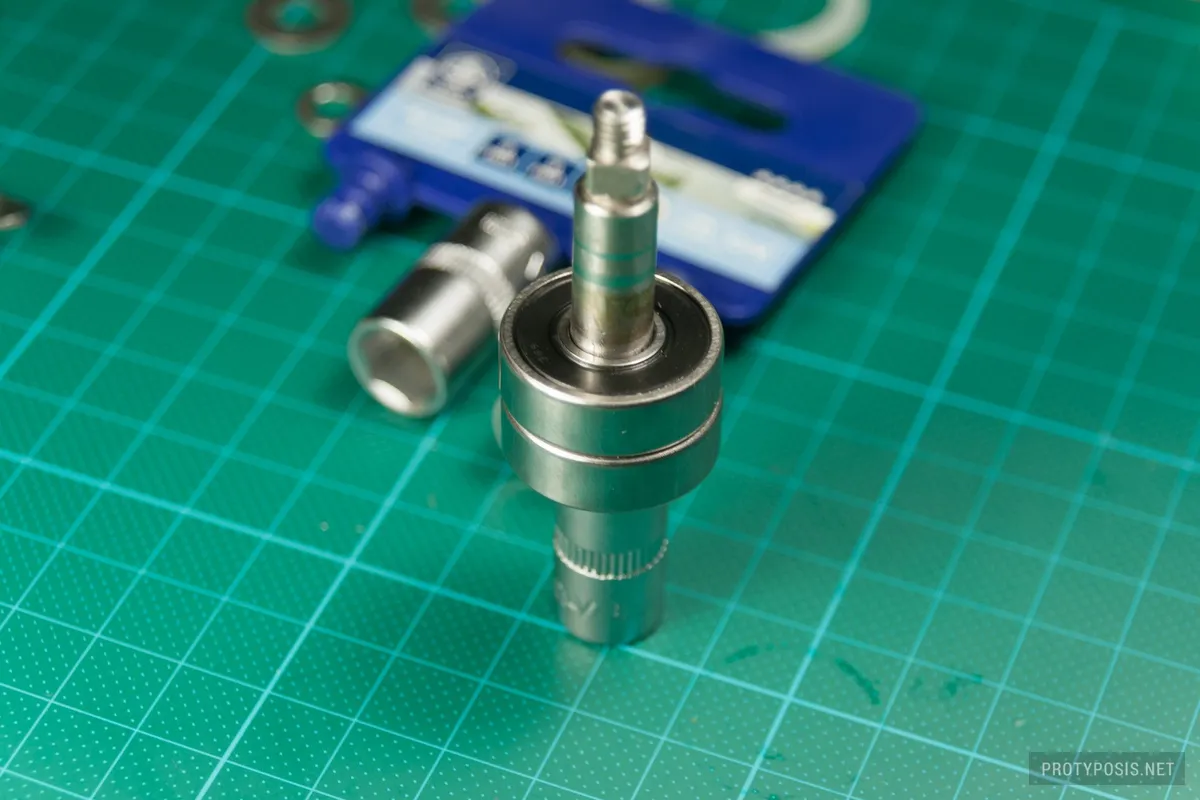
Step 7: When mounting the new bearings, you need to take a lot of care to only apply force to the inner metal ring of the bearings, never on the seals or the outer ring which will break them. To get them back onto the axle, first mount one bearing as in Picture 7a. For this you need some kind of metal tube that easily goes over the axle but only makes contact with the inner ring of the bearing. An 8mm metal wrench socket turned out perfectly for this task. Put the bearing on the axle, put the axle into the opening of the socket and hammer the axle down. Once the first bearing is mounted, add the shim (important!), take the second bearing and repeat the process (Picture 7b). Remember the alignment of the axle with the bearings from step 2 and hammer the axle only as far.
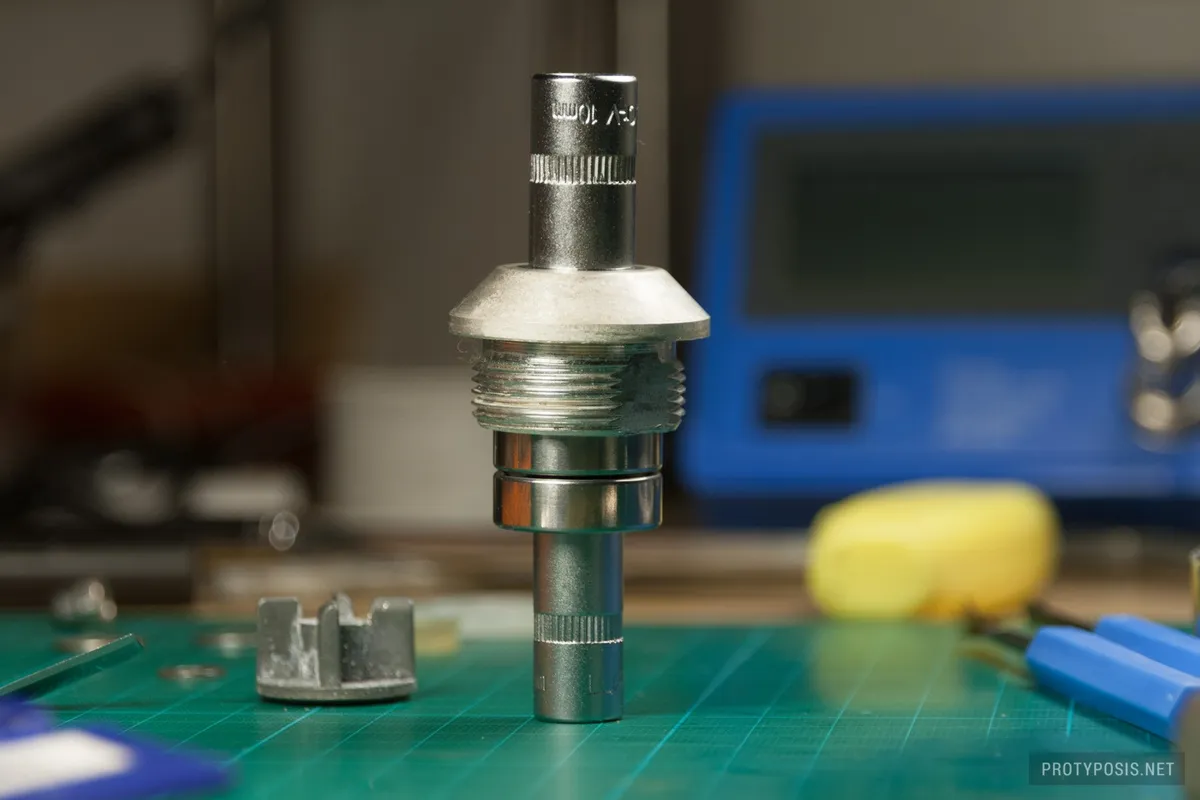
Step 8: The next step is putting the axle with bearings back into the housing. Continuing with the setup of step 7, put the housing on top and hammer it down. Again, you need a kind of tube that lets the axle through and connects to the top of the housing, and a 10mm wrench socket turned out to be the perfect tool (Picture 8).
Step 9: Once the housing is reassembled, put back on the blade parts and drive socket, and reassemble the jar to its initial state. When finished, it’s time to test how it works. Put in some water to cover the blades, turn on the blender at its slowest speed to let the bearings run in for a minute. Now enjoy a nice smoothie to reward yourself for the nice work.
Since changing the bearings, my blender runs better than it ever did. It is quieter and the vibrations are almost gone. Putting in better quality bearings seems to make a real difference, so let’s see how long they last this time. Btw., I think the reason why the bearings were destroyed in the first place was turning on the blender at maximum speed with a lot of stuff in the jar. It happened twice to my blender, the first time making them leak, the second time tearing apart the bearings on the inside. So that’s definitely something to avoid, like the manual already warns… but who reads the manual? :)