Replacing the Nexus 5 Power Button
-
Mario Guggenberger
- January 31, 2015 (updated April 1, 2016)
About one week after the 1-year warranty of my Nexus 5 expired, its power button began to fail out of the blue. Here’s how to replace it.
The failing button led to following symptoms:
- The phone would often show the power menu, or lock itself and turn the screen of
- It often shut itself down, and got stuck in a boot-loop, making it even impossible to access recovery
This seems like a frequent problem and results from a defect power button signaling its pressed state, without being pressed or stuck. Hard tapping on the phone around the power button can temporarily help to get it back to its normal (unpressed) state, which makes it usable again and interrupts boot-loops. Still, this gets more and more annoying over time.
The internet has a few solutions to the problem: factory reset, remapping the power button function to a volume key or minimizing its usage through various third party workaround apps, or sending it in for repair. I tried the factory reset, and it helped for about 10 minutes, which was probably just random luck. Remapping the button is an ugly hack, and the Nexus 5 has no superfluous button that could be used; minimizing the button usage through workarounds, e.g. apps that lock/unlock the screen with the proximity sensor, does not solve the problem at all. Sending it in for repair is way too expensive.
To fight this evil at its root, the power button must be replaced, and since I couldn’t find any guide on the internet, I’ll show you how it’s done. You need at least some SMD soldering skills and preferably a soldering station, else the chance is high that your beloved phone crosses over Jordan. I also highly recommend you to back up your precious data, just to be sure.
Before you begin, you need to get a replacement button. I got mine on eBay for 5€ including shipping. It’s a Citizen Electronics LS12 series switch that is probably just a few cents in wholesale (DigiKey), and it seems to be the same button that is also used in the Galaxy S/S2/S3/S4 and other popular phones.
Procedure
-
1) Removal of back cover and motherboard cover -
2) Motherboard cover removed -
3) Antenna and flex cables on the motherboard -
4) Motherboard removed from the encasing -
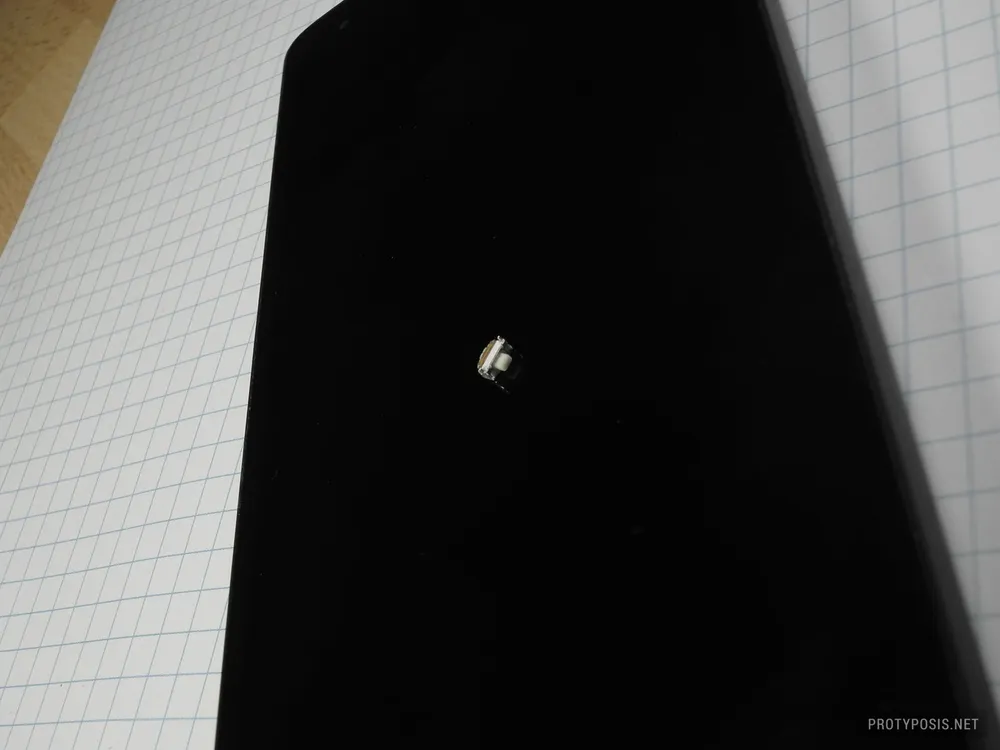
5) The power button on the backside of the motherboard -
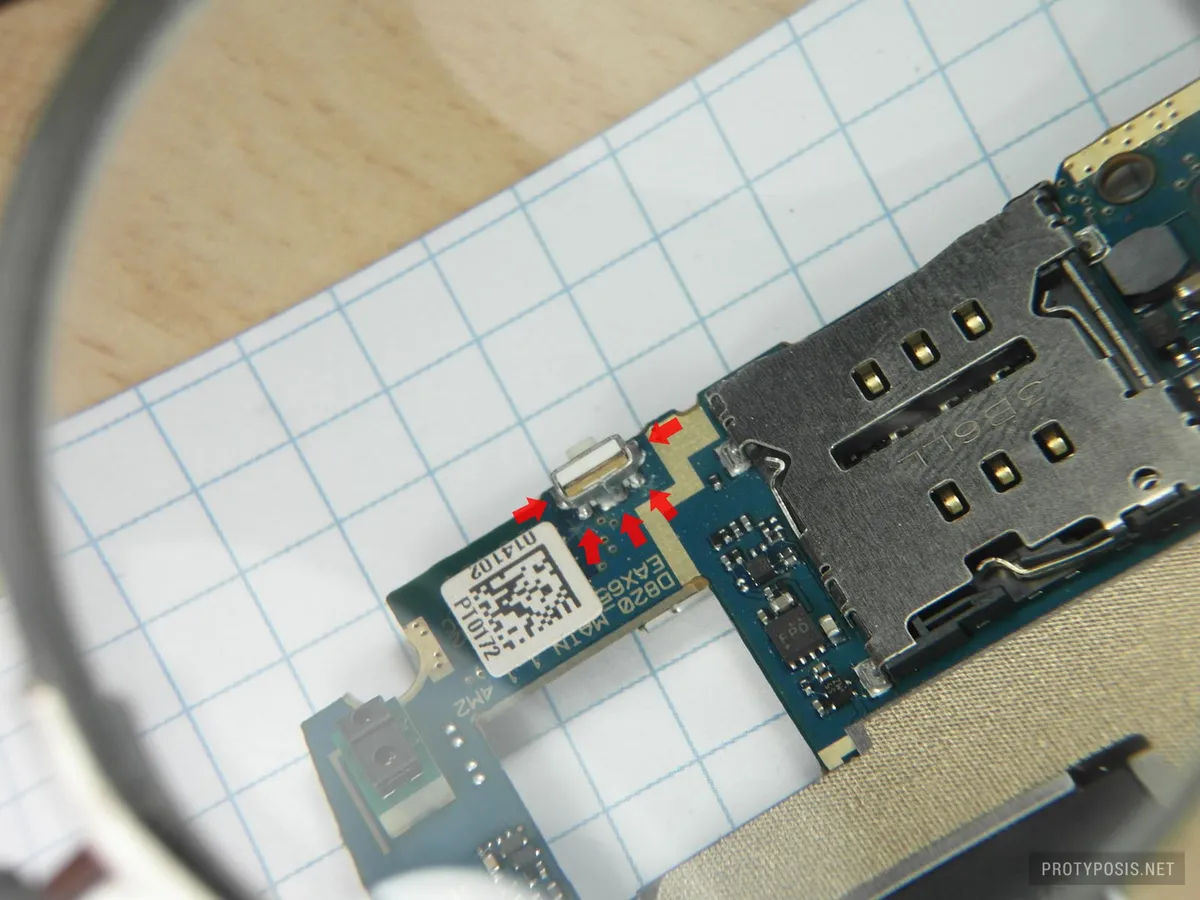
6) The five soldering points around the switch -
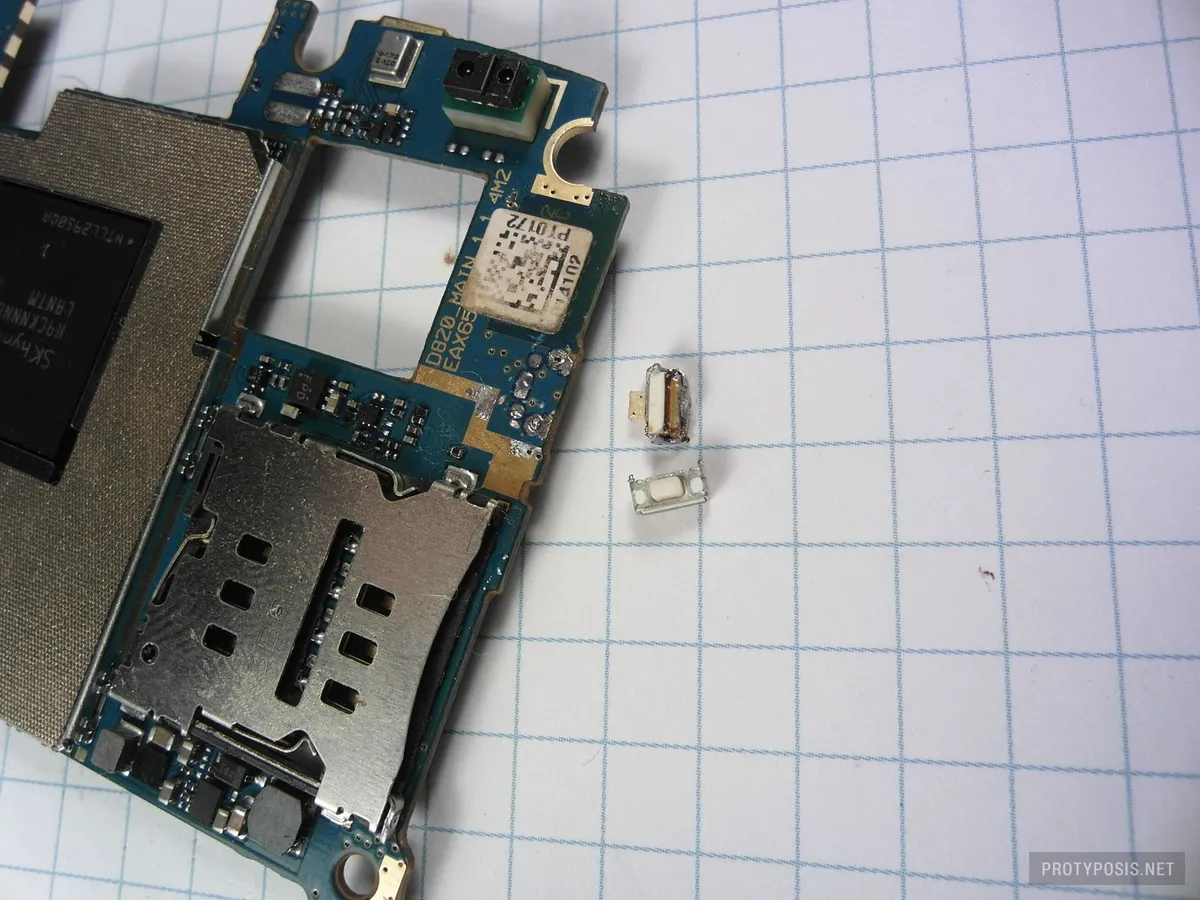
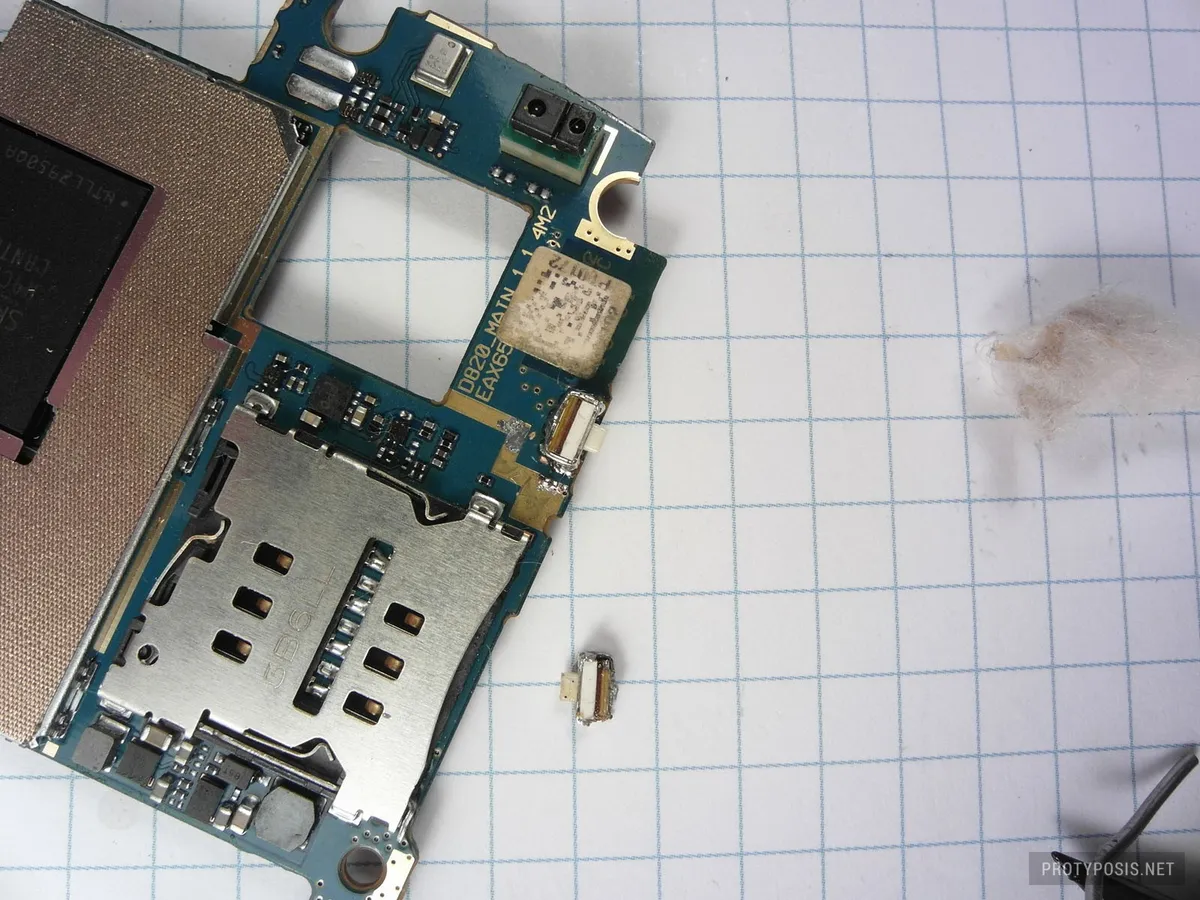
7) Removed power button -
8) New power button installed
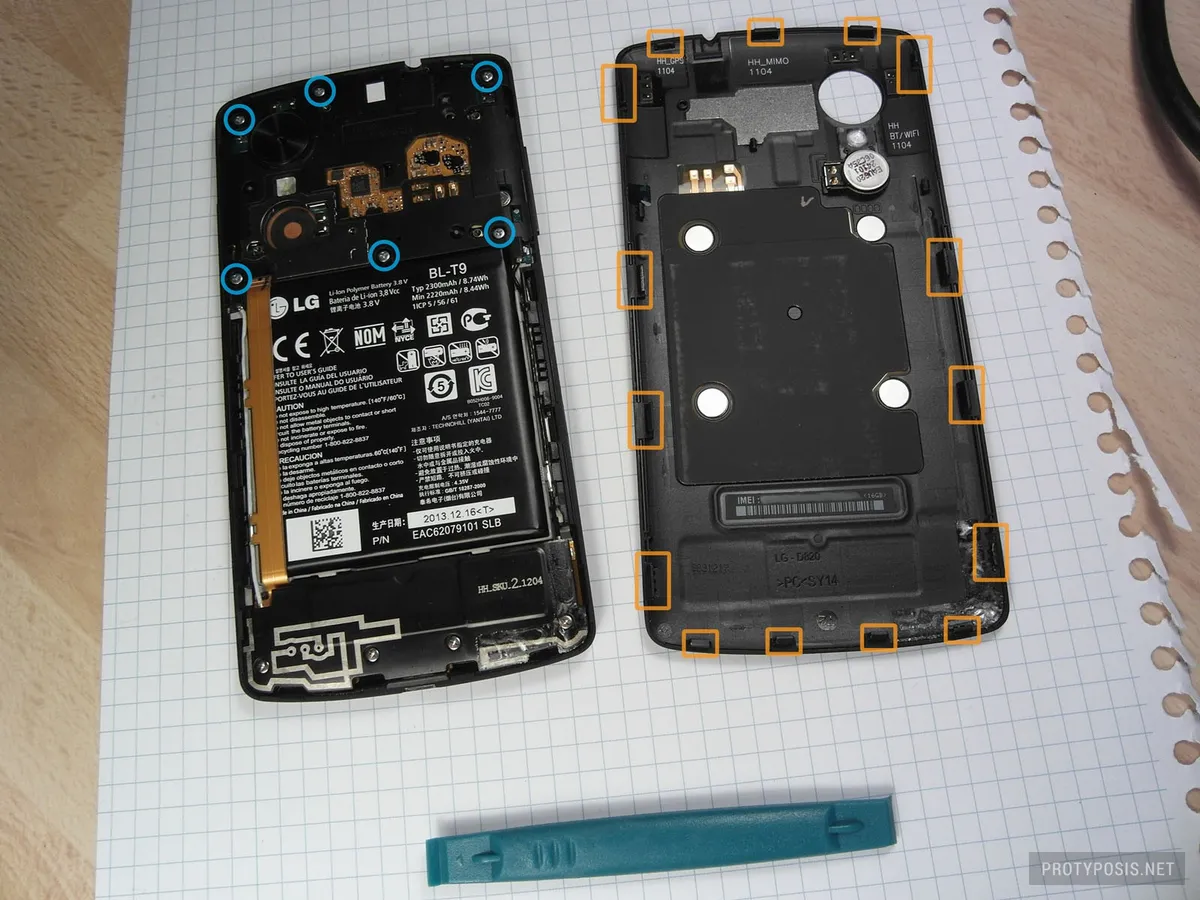
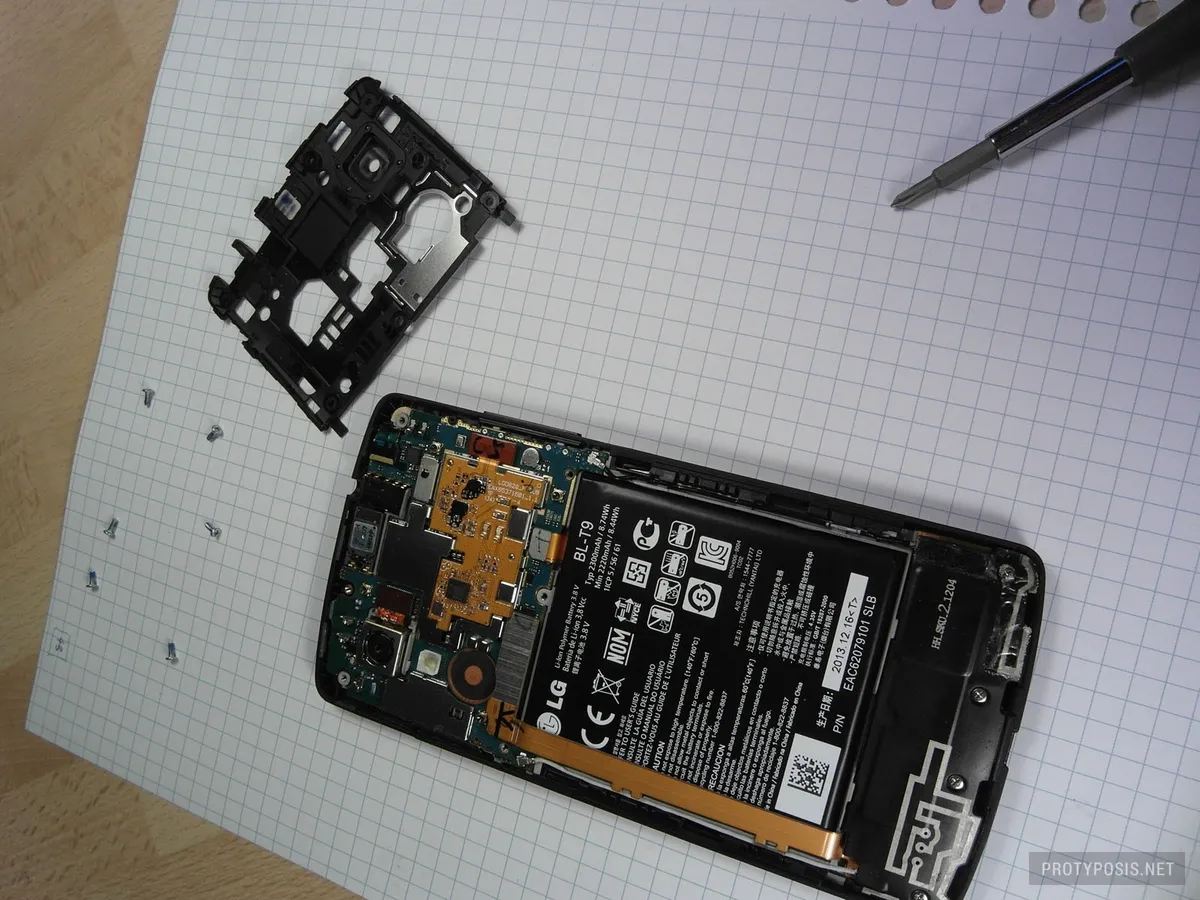
Step 1: Remove the back cover with a plastic opening tool, guitar pick, or whatever you see fit. The cover is held by clips, marked in orange in Picture 1, and some adhesive at the bottom. You can use the iFixit teardown as a more detailed guide on how to disassemble, but keep in mind that you only need to follow certain selected steps, as the target is to just extract the motherboard.
Step 2: Remove the six screws circled in blue in Picture 1, and remove the motherboard cover by carefully levering it off (Picture 2).
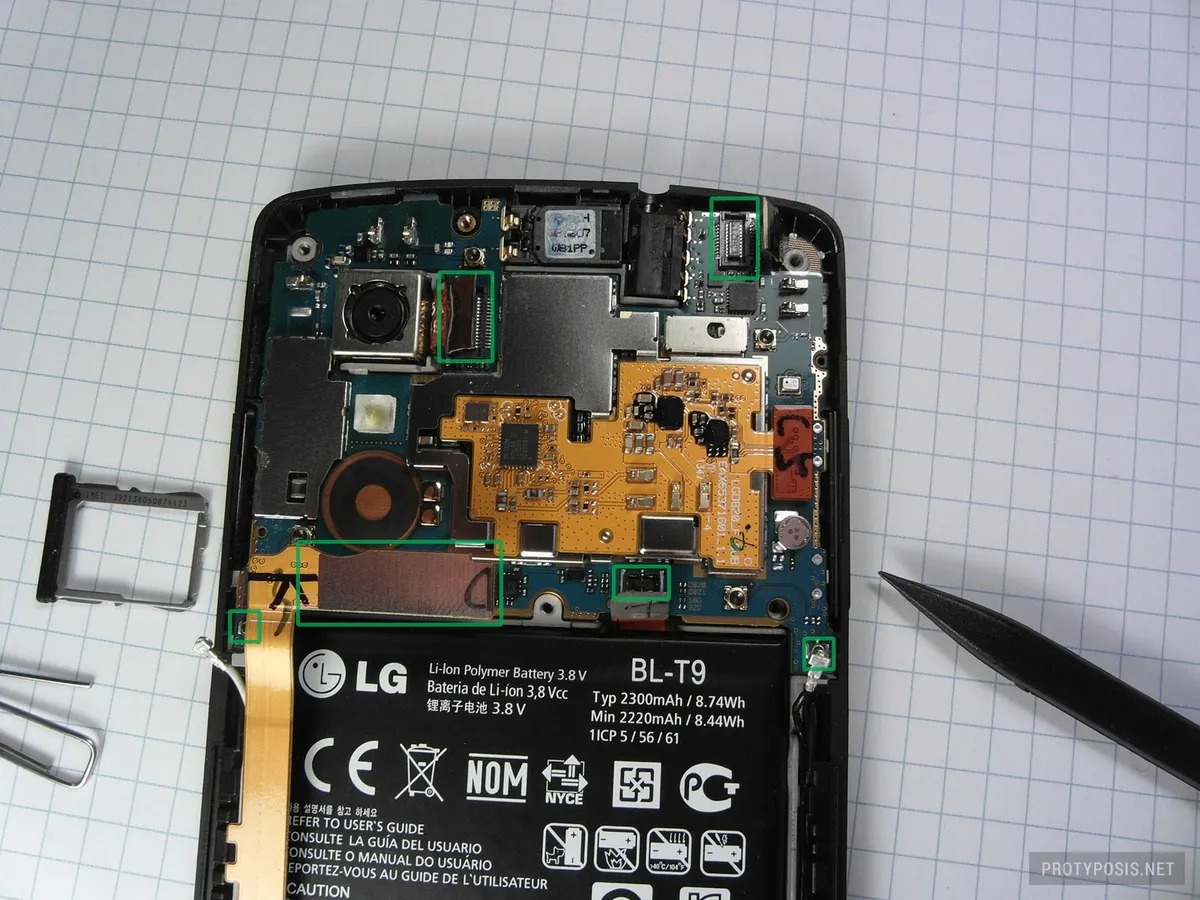
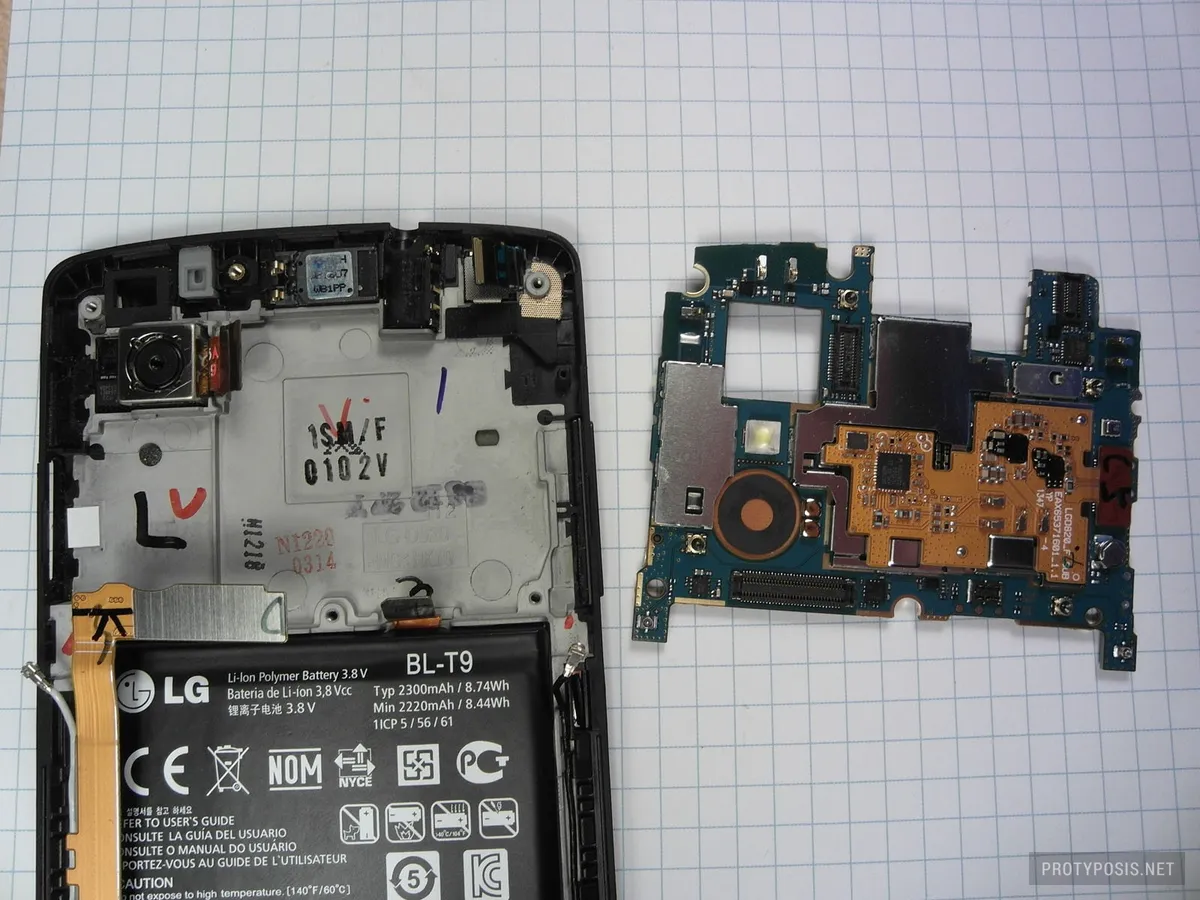
Step 3: Unplug two antenna cables and 4 flex cables marked in green in Picture 3. Also remove the SIM card tray. You should then be able to loosen the motherboard by slighty pulling it downwards and to take it out without any force applied (Picture 4).
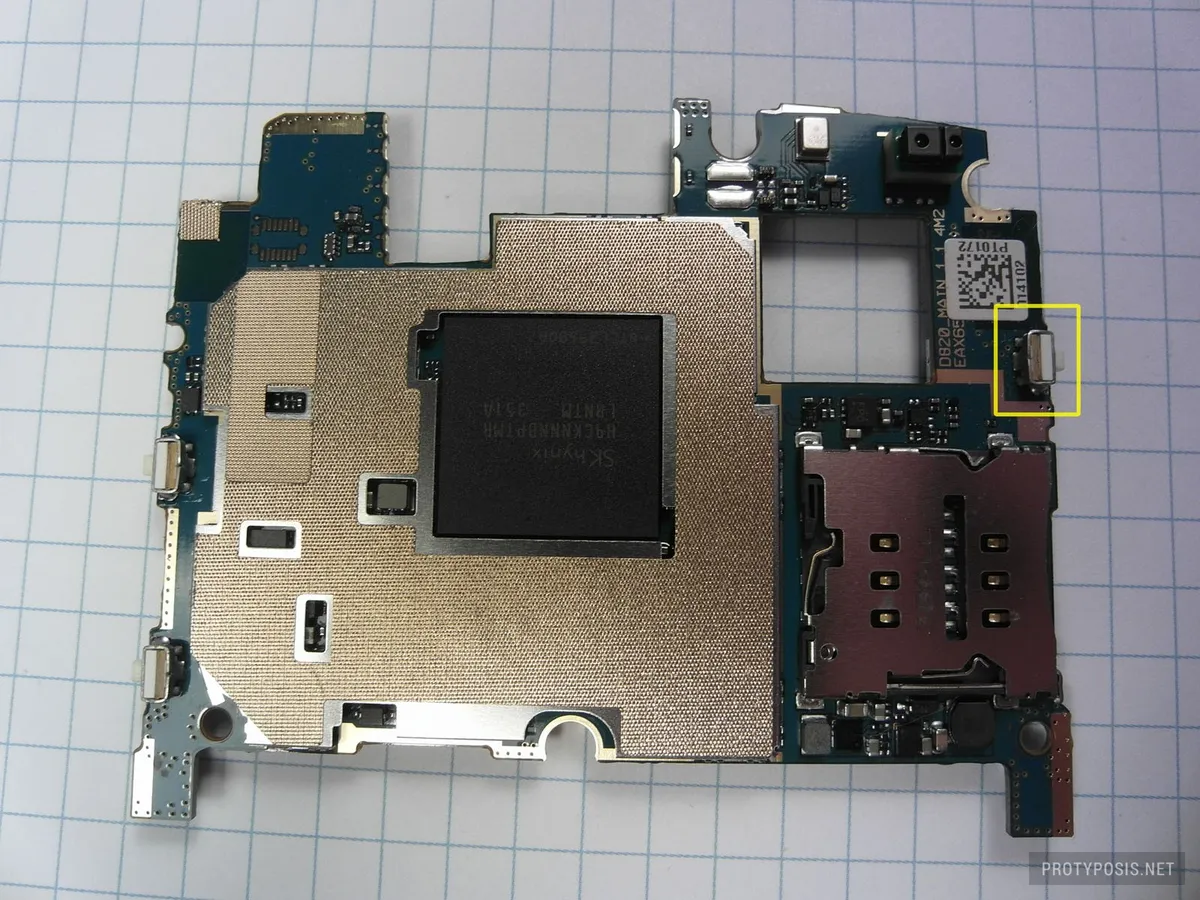
Step 4: The power button can be found on the back side of the motherboard (Picture 5). It is held in place and connected to the circuitry by 5 solder points (Picture 6). Now comes the dirty part, removing the broken power button. There are multiple methods on how to do that. The cleanest way is to use a hot air station, as seen in this YouTube video. Another way is to scrape off the power button like in this video, but this seems to be rather risky to me as the soldering pads could come off the PCB. I chose the solder wick method in this video. Since factories have to use lead-free solder which has a much higher melting point that lead solder, it is hard to get off. My selected method proposes to add lead solder and get it mixed with the lead-free solder, lowering the melting temperature and making it easier to get it off with solder wick. It took me multiple tries, which is why the result looks like a huge ugly mess (Picture 7), but I finally managed to get the button off. Just make sure that the surrounding components do not get too hot or damaged.
Step 5: Clean up the soldering pads with some flux and solder wick, then put the new switch in place, add flux, and solder the five points with just a bit of solder. Take a multimeter and make sure there is no short and the button works as expected. Check the two outer points on the back of the switch, they should only conduct when the button is pressed. You can take the two volume buttons on the other end as a reference. Clean away flux residue from the switch.
Step 6: Reassemble the phone. After putting on the back cover, press tightly all over the back to make it snug fit again. Press the power button, and pray. If it boots up, enjoy your Nexus 5 for another year ;) If not, well…
Troubleshooting & Tips
- NFC or wireless charging does not work: the back cover did not snap in everywhere - press below the camera to bring the contacts closer together
- Button gets stuck after some time: There might be flux residue in the button - this stuff gets sticky when it dries and could jam the button. Flush and clean it with isopropyl alcohol and a q-tip. (Thanks to reader Eric Dargelies)
- “I found the easiest way to remove the switch was to flow additional solder around all contact points of the switch until all points are flowing together and then lightly ease the switch away from the board. Once removed, clean the pads up with a desolder station or solder sucker.” and “One complication is that it is not a purely SMD part, there are locating pins. I could not wick the solder out of those holes but instead had to heat them and push the part in when they got hot enough.” (thanks joe1724 and Martin)
- “You can remove the old switch with some snippers. After you clean up the pads, put a little solder paste on each pad and on the switch contacts too. All you need to do is touch the iron to the pad then everything will flow together. The paste usually has flux in it so you don’t have to add any. Do the two outside pins first and press the switch down if you were unable to clean out the holes.” (thanks Argus Brown)
- “If anyone rips the pads off like I did, you can still fix it if you have good soldering skills and electronics knowledge. Download the LG Nexus 5 D820 service manual from the net (its all over the place), and search the doc for KBR11000. That’s the button. You’ll find a circuit diagram, and be able to figure out where to solder wire links to. I ripped off one of the 2 small pads, and had to put a wire link between the new button pin 1 and a nearby resistor (R11010).” (thanks Chris)
(Reader’s tips are copied from the comments of my old Wordpress blog.)